Marbling Crafts with Nail Polish can transport you into a soothing world of color and texture, where gentle swirls mingle in mesmerizing patterns. As you dip your tools into the swirling pools of nail polish, the vibrant colors blend and dance, creating a calming experience that invites focus and creativity. This craft not only results in a beautiful piece, but also engages your senses, making it a delightful process to enjoy. You may also find Diy Bioplastic Suncatchers With Flowers useful.
The Quiet Joy of Making Marbling Crafts with Nail Polish
Slowing down to create something beautiful can have a profound impact on your mental state. The act of marbling with nail polish encourages mindfulness, as you watch the colors flutter and twist before your eyes. Each small motion invites you to become fully immersed in the task, drawing your thoughts away from daily stresses. This slow, intentional pace can bring a sense of calmness and satisfaction. You may also find Easy Mothers Day Crafts For Little Hands useful.
A Gentle Look at the Process
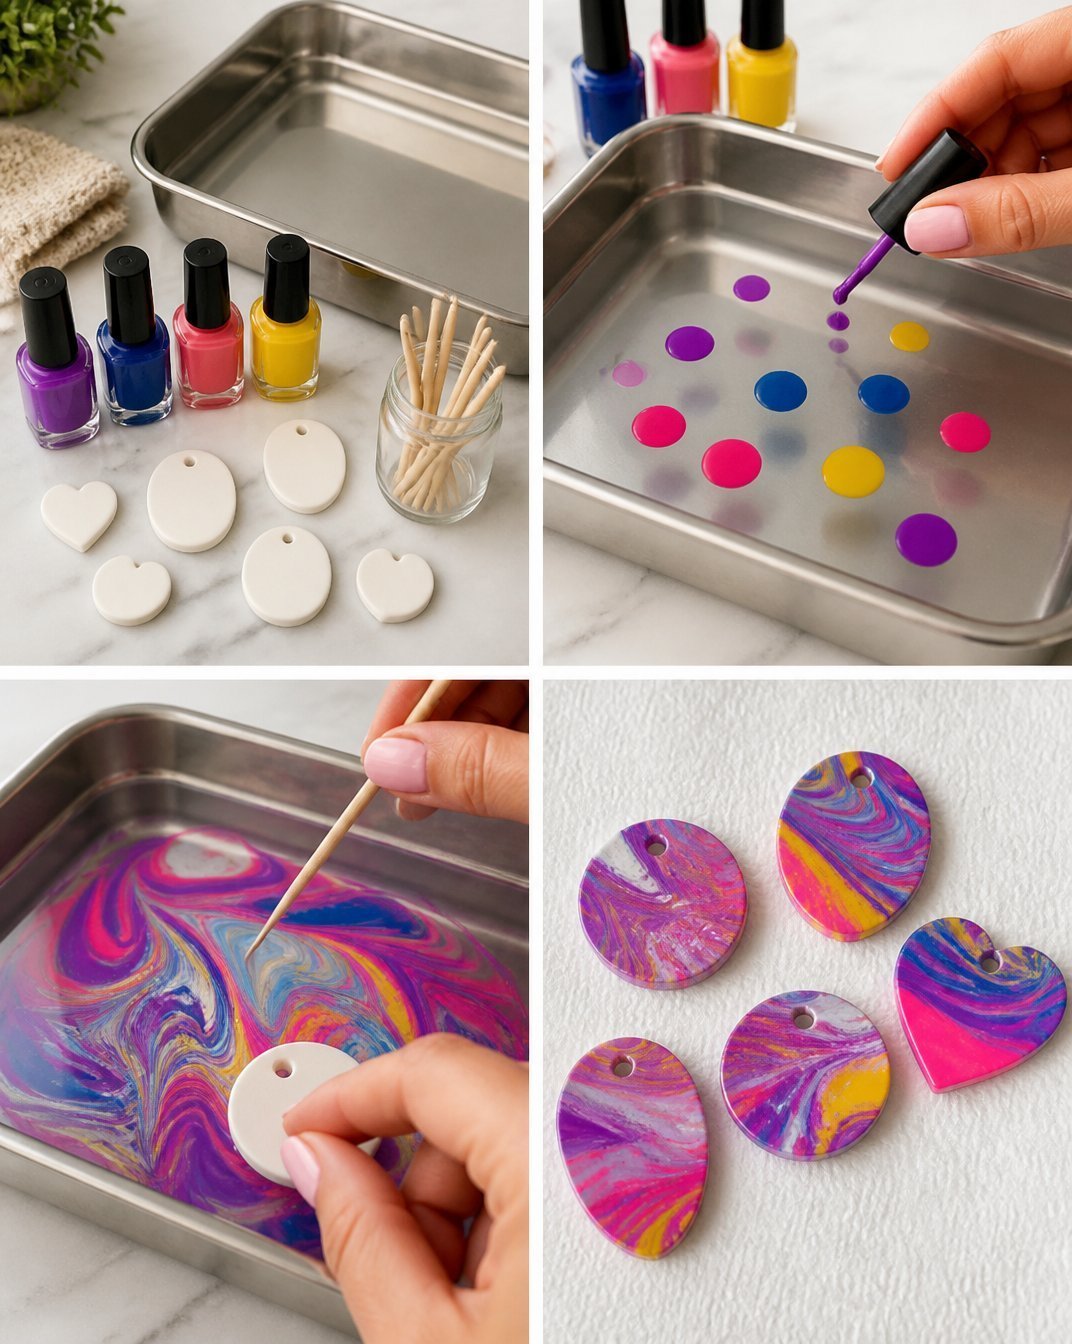
The process of creating marbled crafts with nail polish flows like a quiet stream, inviting creativity and exploration. You’ll start by setting your materials around you, enjoying the way they feel in your hands. The smoothness of the polished surfaces and the vibrant colors create a rhythm that is both satisfying and captivating. As you begin to work, you might hear the soft sounds of the polish brushing against the surface, each stroke adding to the beautiful chaos that’s about to unfold. You may also find Glitter Jar Calm Big Feelings With Joy useful.
Materials You’ll Need
To embark on your marbling journey, gather these materials: You may also find How To Make A Suncatcher With Glass Beads useful.
- Nail polish (multiple colors)
- A shallow dish
- Warm water
- Stir sticks or toothpicks
- Paper or other objects to marble
- Gloves (optional, for easy cleanup)
These items can usually be found around your home or at a local craft store, making it easy to begin this calming project.
Step-by-Step Directions
Begin by pouring warm water into the shallow dish, filling it about halfway. The warmth helps the nail polish spread easily, creating beautiful patterns.
Open your first bottle of nail polish and gently drop a small amount onto the surface of the water. Observe how it spreads and floats, creating a mesmerizing pattern.
Continue adding drops of different colors, allowing each layer to rest briefly before adding the next one. Take a moment to appreciate the interplay of hues as they merge and blend.
Use a stir stick or toothpick to gently swirl the colors together. Move slowly and deliberately, noticing how the patterns change with each stroke.
Once you’re pleased with the design, carefully place your chosen paper or object onto the surface of the water. Hold it there for a few seconds, allowing the polish to adhere.
Lift it off slowly and place it aside to dry. Be mindful of the moment, enjoying the beauty of your creation.
Enjoying the Finished Piece
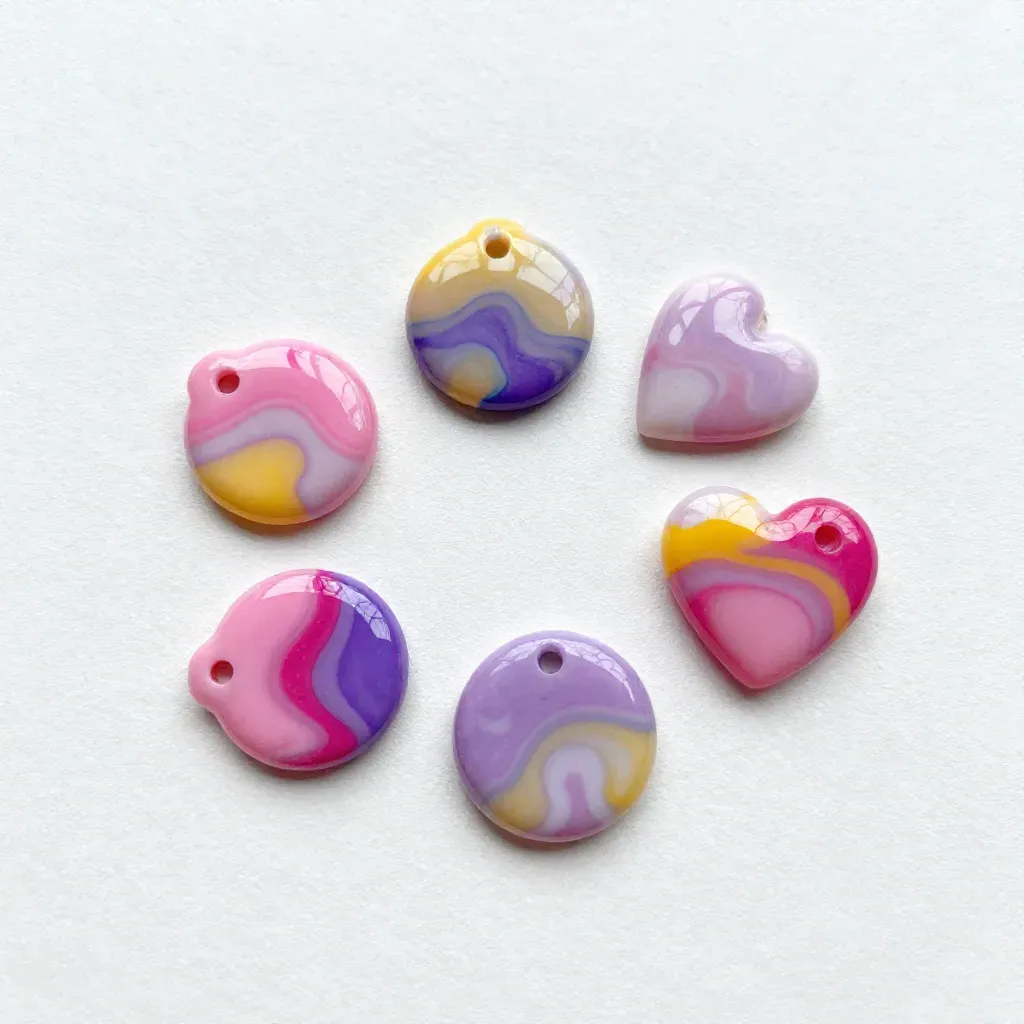
Once your marbled creation has dried, take a moment to admire your work. The swirls of color can turn everyday items into striking pieces of art. Whether you choose to display your artwork on a shelf, use it as a decorative card, or even turn it into a thoughtful gift, the finished piece is sure to evoke feelings of calm and joy. Transforming simple materials into something beautiful allows your personality to shine through, creating a lovely connection to your work.
How to Store or Reuse Marbling Crafts with Nail Polish
To keep your marbled creations looking fresh, store them in a dry, cool place away from direct sunlight. If you made marbled cards or similar items, consider placing them in a protective folder to prevent dust build-up. Alternatively, you can repurpose projects by cutting them into smaller pieces for gift tags or bookmarks, extending the life of your beautiful work.
Gentle Tips & Variations
Experiment with different types of nail polish, noting how the textures and finishes affect the marbling effect. Glitter polish, for instance, can add a captivating sparkle.
Try out various objects to marble, such as wood pieces or glass jars, to see how different surfaces interact with the polish.
Adjust the water temperature; cooler water can sometimes yield different, interesting results.
Embrace spontaneity; let the colors flow in a way that feels natural to you, rather than striving for perfection.
FAQs About Marbling Crafts with Nail Polish
What types of surfaces can I marble?
You can marble various surfaces, such as paper, wood, or even glass. Each material reacts differently, producing unique results.
Is nail polish safe to use for kids?
While nail polish can be fun for children, it’s best to supervise closely and consider using non-toxic options or alternatives like washable paints for younger kids.
How do I clean up after marbling?
To clean up, you can use acetone-based nail polish remover. Make sure to work in a well-ventilated area, and consider wearing gloves to keep your hands clean.
Conclusion
Creating marbling crafts with nail polish is not just about making beautiful objects; it’s about finding peace in the process. As you explore this vibrant art form, allow yourself to relish each moment spent creating. For a deeper dive into similar craft techniques, you might consider checking out how to marble with nail polish for more creative inspiration. Embrace the journey, and let your creativity flow freely as you engage with the world of color and texture.